Configuration Management
This article describes a set of commands used for configuration management.
Configuration Undo and Redo
Any action done in the GUI or any command executed from the CLI is recorded in /system/history. You can undo or redo any action by running undo or redo commands from the CLI or by clicking on Undo and Redo buttons from the GUI.
A simple example to demonstrate the addition of the firewall rule and how to undo and redo the action:
[admin@v7_ccr_bgp] /ip/firewall/filter> add chain=forward action=drop
[admin@v7_ccr_bgp] /ip/firewall/filter> print
Flags: X - disabled, I - invalid; D - dynamic
0 X chain=input action=drop protocol=icmp src-address=10.155.101.1 log=no
log-prefix=""
1 chain=forward action=drop
[admin@v7_ccr_bgp] /ip/firewall/filter> /system/history/print
Flags: U - undoable, R - redoable, F - floating-undo
Columns: ACTION, BY, POLICy
ACTION BY POLIC
F added admin write
U --- write
[admin@v7_ccr_bgp] /ip/firewall/filter>
We have added a firewall rule and in /system/history we can see all that was done.
Let's undo everything:
[admin@v7_ccr_bgp] /ip/firewall/filter> /undo
[admin@v7_ccr_bgp] /ip/firewall/filter> print
Flags: X - disabled, I - invalid; D - dynamic
0 X chain=input action=drop protocol=icmp src-address=10.155.101.1 log=no
log-prefix=""

[admin@v7_ccr_bgp] /ip/firewall/filter>
As you can see the firewall rule disappeared.
Now redo the last change:
[admin@v7_ccr_bgp] /ip/firewall/filter> /redo
[admin@v7_ccr_bgp] /ip/firewall/filter> print
Flags: X - disabled, I - invalid; D - dynamic
0 X chain=input action=drop protocol=icmp src-address=10.155.101.1 log=no
log-prefix=""

1 chain=forward action=drop

[admin@v7_ccr_bgp] /ip/firewall/filter>
System history is capable of showing exact CLI commands that will be executed during "Undo" or "Redo" actions even if we perform the action from the GUI, for example, detailed history output after adding a TCP accept rule from WinBox:
[admin@v7_ccr_bgp] /system/history> print detail
Flags: U - undoable, R - redoable, F - floating-undo
 F redo=
      /ip/firewall/filter/add action=accept chain=forward disabled=no log=no \
          log-prefix="" protocol=tcp
    undo=/ip/firewall/filter/remove *4 action="filter rule added" by="admin"
    policy=write time=2019-10-10 18:51:05

 F redo=/ip/firewall/filter/add action=accept chain=forward
    undo=/ip/firewall/filter/remove *3 action="filter rule added" by="admin"
    policy=write time=2019-10-10 18:49:03


U redo="" undo="" action="---" by="" policy=write time=2019-09-27 13:07:35
[admin@v7_ccr_bgp] /system/history>
Safe Mode
It is sometimes possible to change router configuration in a way that will make the router inaccessible (except from the local console). Usually, this is done by accident, but there is no way to undo the last change when the connection to the router is already cut. Safe mode can be used to minimize such risk.
The "Safe Mode" button in the Winbox GUI allows you to enter Safe Mode, while in the CLI, you can access it by either using the keyboard shortcut F4 or pressing [CTRL]+[X]. To exit without saving the changes made in CLI, hit [CTRL]+[D].
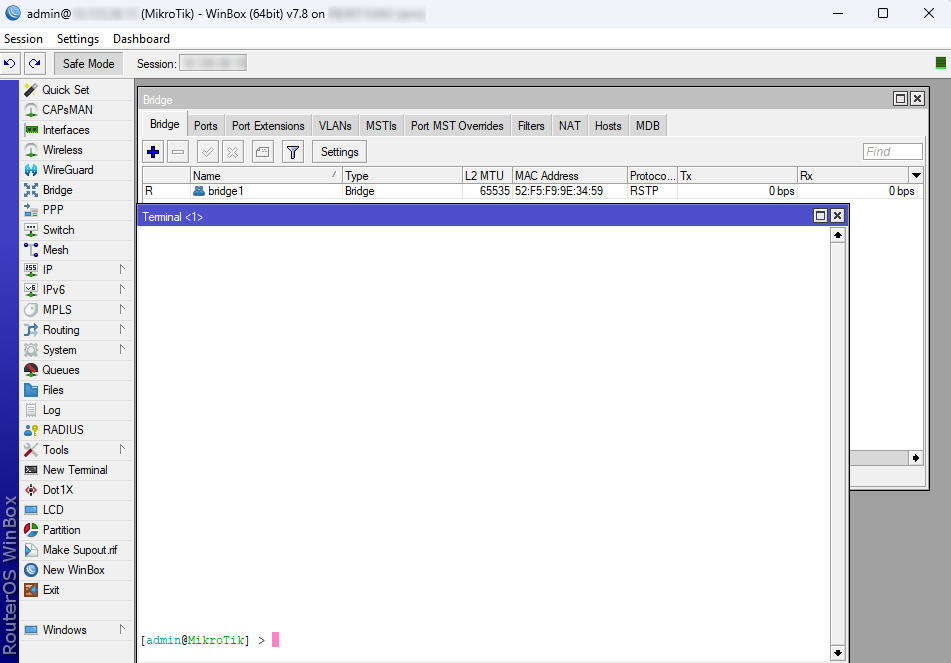
[admin@MikroTik] /ip/route>[CTRL]+[X]
[Safe Mode taken]
[admin@MikroTik] /ip/route<SAFE>
The message Safe Mode taken is displayed and the prompt changes to reflect that the session is now in safe mode. All configuration changes that are made (also from other login sessions), while the router is in safe mode, are automatically undone if the safe mode session terminates abnormally. You can see all such changes that will be automatically undone and tagged with an F flag in the system history:
[admin@MikroTik] /ip/route>
[Safe Mode taken]
[admin@MikroTik] /ip/route<SAFE> add
[admin@MikroTik] /ip/route<SAFE> /system/history/print
Flags: U, F - FLOATING-UNDO
Columns:
ACTION, BY, POLICY ACTION BY POLICY
F 0.0.0.0/0 added admin write
Now, if the telnet connection (or WinBox terminal) is cut, then after a while (TCP timeout is 9 minutes) all changes that were made while in safe mode will be undone. Exiting the session by [Ctrl]+[D] also undoes all safe mode changes, while /quit does not.
If another user tries to enter safe mode, he's given the following message:
[admin@MikroTik] >
Hijacking Safe Mode from someone - unroll/release/don't take it [u/r/d]:
- [u] - undoes all safe mode changes, and puts the current session in safe mode.
- [r] - keeps all current safe mode changes, and puts the current session in safe mode. The previous owner of safe mode is notified about this.
[admin@MikroTik] /ip/firewall/rule/input
[Safe mode released by another ]
- [d] - leaves everything as-is.
If too many changes are made while in safe mode, and there's no room in history to hold them all (currently history keeps up to the 100 most recent actions), then the session is automatically put out of the safe mode, and no changes are automatically undone. Thus, it is best to change the configuration in small steps, while in safe mode. Pressing [Ctrl]+[X] twice is an easy way to empty the safe mode action list.
System Backup and Restore
System backup is the way to completely clone the router configuration in binary format.
More information about Backup and Restore is found here.
Configuration Export and Import
RouterOS allows exporting and importing parts of the configuration in plain text format. This method can be used to copy bits of configuration between different devices, for example, clone the whole firewall from one router to another.
An export command can be executed from each menu (resulting in configuration export only from this specific menu and all its sub-menus) or from the root menu for complete config export and is available for the CLI only.
The Export command does not export system user passwords, installed certificates, SSH keys, Dude, or a User-manager database.
Installed certificates, Dude, and User Manager databases must be manually exported and imported into a new device.
System user passwords and user SSH keys can not be exported.
Warning: During config import, we suggest using the same RouterOS version used during config export to prevent cases when some of the commands do not exist in one or another RouterOS version.
Configuration Export
The following command parameters are accepted:
| Property | Description |
|---|---|
| compact | Outputs only the modified configuration. Starting from v6rc1, "export compact" became the default behavior, so "export" and "export compact" now produce identical output. |
| file | Exports configuration to a specified file. When the file is not specified export output will be printed to the terminal |
| path | The parameter allows including or excluding specific configuration menus from the router's entire configuration |
| show-sensitive | Shows sensitive information, like passwords, keys, etc. By default, sensitive information is hidden. List of menus with sensitive parameters |
| terse | With this parameter, the export command will output the configuration as full commands on separate lines, each including the corresponding menu path. |
| verbose | With this parameter, the export command will output the whole configuration parameters and items including defaults. |
For example, export configuration from the /ip/address menu and save it to a file:
[admin@MikroTik] > /ip/address/print
Flags: X - disabled, I - invalid, D - dynamic
# ADDRESS NETWORK BROADCAST INTERFACE
0 10.1.0.172/24 10.1.0.0 10.1.0.255 bridge1
1 10.5.1.1/24 10.5.1.0 10.5.1.255 ether1
[admin@MikroTik] > /ip/address/export file=
[admin@MikroTik] > /file/print
# NAME TYPE SIZE CREATION-TIME
0 .rsc 315 2003-12-23 13:21:48
[admin@MikroTik] >
By default, the export command writes only user-edited configuration, RouterOS defaults are omitted.
For example, the IPSec default policy will not be exported, and if we change one property then only our change will be exported:
[admin@rack1_b4] /ip/ipsec/policy> print
Flags: T - template, X - disabled, D - dynamic, I - inactive, * - default
0 T * group=default src-address=::/0 dst-address=::/0 protocol=all
proposal=default template=yes
[admin@rack1_b4] /ip/ipsec/policy>
# 1970-04-02 17:59:14 by RouterOS 6.22
# software id = DB0D-LK67
#
[admin@rack1_b4] /ip/ipsec/policy> set 0 protocol=gre
[admin@rack1_b4] /ip/ipsec/policy>
# 1970-04-02 17:59:30 by RouterOS 6.22
# software id = DB0D-LK67
#
/ip/ipsec/policy
set 0 protocol=gre
Example of how to import entire /ip/firewall configuration, except /ip/firewall/nat
/export path=/ip/firewall,!/ip/firewall/nat
/ip/firewall/address-list
add address=1.1.1.1 list=
/ip/firewall/filter
add action=passthrough chain=unused-hs-chain comment="place hotspot rules here" disabled=yes
add action=add-src-to-- address-list=12345 address-list-timeout=15s chain=input disabled=yes
add action=accept chain=output dst-port=80,443 log=yes protocol=tcp
/ip/firewall/mangle
add chain=prerouting
add action=accept chain=prerouting
add action=accept chain=prerouting dst-address=192.168.88.0/24 in-interface=ether2
Note:
The * flag indicates that the entry is system default and cannot be removed manually.
Here is the list of all menus containing default system entries
| Menu | Default Entry |
|---|---|
/interface/wireless/security-profiles | default |
/ppp/profile | "default", "default-encryption" |
/ip/hotspot/profile | default |
/ip/hotspot/user/profile | default |
/ip/ipsec/policy | default |
/ip/ipsec/policy/group | default |
/ip/ipsec/proposal | default |
/ip/ipsec/mode-conf | read-only |
/ip/smb/shares | pub |
/ip/smb/users | guest |
/ipv6/nd | any |
/mpls/interface | all |
/routing/bfd/interface | all |
/routing/bgp/instance | default |
/routing/ospf/instance | default |
/routing/ospf/area | backbone |
/routing/ospf-v3/instance | default |
/routing/ospf-v3/area | backbone |
/snmp/community | public |
/tool/mac-server/mac-winbox | all |
/tool/mac-server | all |
/system/logging | "info", "error", "warning", "critical" |
/system/logging/action | "memory", "disk", "echo", "remote" |
/queue/type | "default", "ethernet-default", "wireless-default", "synchronous-default", "hotspot-default", "only-hardware-queue", "multi-queue-ethernet-default", "default-small" |
If some specific menu will not be able to respond to the export command, starting from RouterOS v7.11, an error message will be printed out in the export command output after a timeout ("#error exporting "/xxx" (timeout)") and the process will move on to the next menu.
Starting from RouterOS 7.13, you can export parts of a specific menu. For instance, it is possible to export a specific address-list among multiple address-lists on your router.
[admin@MikroTik] > ip firewall address-list export where list=mylist
Configuration Import
Root menu command import allows running a configuration script from the specified file. The script file (with extension ".rsc") can contain any console command including complex scripts.
For example, load a saved configuration file
[admin@MikroTik] > import .rsc
Opening file .rsc
Script file loaded and executed successfully
[admin@MikroTik] >
Import command allows you to specify the following parameters:
| Property | Description |
|---|---|
| from-line | Start executing the script from the specified line number. This option is only available in verbose mode. |
| file-name | Name of the script (.rsc) file to be executed. |
| verbose | Reads each line from the file and executes individually, allowing one to debug syntax or other errors more easily. |
| dry-run | Simulates the import without making any configuration changes. This helps in catching syntax errors. This option is only available in verbose mode. |
If the device has a default or existing configuration that requires replacement, it is necessary to initiate a configuration reset.
This involves applying a clean, empty configuration using the command /system/reset-configuration no-defaults=yes, followed by a device reboot.
Auto Import
It is also possible to automatically execute scripts after uploading to the router with FTP or SFTP. The script file must be named with the extension *.auto.rsc. Once the commands in the file are executed, a new *.auto.log file is created which contains import success or failure information.
".auto.rsc" in the filename is mandatory for a file to be automatically executed.
Import troubleshooting
Configuration parts to watch out for in exported .rsc files
Things that should be removed from export files that were created with "/export", before attempting import on a new device:
- Interface renaming conflicts with the default ethernet naming scheme.
/interface/ethernet
set [ find default-name=ether5 ] auto-negotiation=no name=ether1-gateway
set [ find default-name=ether6 ] name=ether2
set [ find default-name=ether7 ] name=ether3
set [ find default-name=ether8 ] name=ether4
set [ find default-name=ether1 ] name=ether5
set [ find default-name=ether2 ] name=ether6
set [ find default-name=ether3 ] name=ether7
set [ find default-name=ether4 ] name=ether8
- In older versions "export" default entries might show with "add" instead of the "set" command. That should be edited before import to avoid errors.
- Check if the total number of physical interfaces matches the new and old devices. If there are some missing that will result in an error during .rsc import.
In case of a problematic import, attempt the following:
- Use the dry-run parameter to simulate the import without making any configuration changes. This helps in catching syntax errors. This option is only available in verbose mode.
- Reset the configuration on that device.
- Run the import command again with the "verbose=yes" argument. It will also stop the import process on a problem that you already encountered, but will also show the place where the export failed. This way shows you the place where things need to be edited in the .rsc import file.
Startup delay
If your configuration relies on interfaces that might not yet have started up upon command execution, it is suggested to introduce delays or to monitor until all needed interfaces are available. This example script allows you to set how many interfaces you are expecting, and how long to wait until they become available:
{
:local i 0
#Number of interfaces. It is necessary to reconfigure this number for each device (/interface/print count-only)
:local x 10
#Max time to wait
:local t 30
while ($i < $t && [:len [/interface/find]] < $x) do={
:put $i
:set $i ($i + 1)
:delay 1
}
if ($i = $t) do={
:log warning message="Could not load all physical interfaces"
} else={
#Rest of your script
}
}
The above script will wait until there are 10 interfaces visible, or 30 seconds. If there are not 10 interfaces at this time, it will put a message in the log. Modify the variables according to your needs.
Configuration Reset
RouterOS allows resetting configuration with the /system/reset-configuration command
This command clears all configuration of the router and sets it to the factory defaults including the login name and password ('admin' with an empty password or, for some models, the user and wireless passwords on the sticker). For more details on the default configuration see the list.
After executing the configuration reset command, the router will reboot and load the default configuration. Starting from version 7.13, following the reset, a license prompt will be displayed with the option to view the end-user license agreement.
The backup file of the existing configuration is stored before reset. That way you can easily restore any previous configuration if the reset is done by mistake.
Caution: If the router was installed using Netinstall and had a script specified as the initial configuration, the reset command executes this script after purging the configuration. To stop it from doing so, you will have to reinstall the router.
It is possible to override the default reset behavior with the parameters below:
| Property | Description |
|---|---|
| keep-users | Do not remove existing users from the configuration |
| no-defaults | Do not load the default configuration, just clear the configuration |
| skip-backup | Skip automatic backup file generation before reset |
| run-after-reset | Run the specified .rsc file after reset. That way you can load your custom configuration. Warning: If a specific .rsc file execution takes more than 2 minutes, a script will fail, and LOG will contain "runtime limit exceeded" or in rare cases "std failure: timeout" error. |
| caps-mode | Run the caps-mode script after configuration reset. |
For example, hard reset configuration without loading default config and skipping backup file:
[admin@MikroTik] > /system/reset-configuration no-defaults=yes skip-backup=yes
Dangerous! Reset anyway? [y/N]: y
And the same using Winbox:

Related topics
Default configurations
All MikroTik devices come with some kind of default configuration. There are several different configurations depending on board type:
List of menus with sensitive parameters
Below you can find a list of menus where sensitive (shown only when show-sensitive parameter is used or alternatively hidden when "Hide password" is enabled in WinBox settings) parameters can be configured. For more detailed information, please refer to the corresponding menu documentation pages.